@markdown
# Spring DI 자동 주입, AOP
<br/>
## DI 자동 주입(Annotation)
____
- XML 파일이 커지는 것을 방지
- 자동 주입 기능 사용시 Spring이 알아서 의존 객체를 찾아서 주입함
- 자동 주입 기능 사용방법
- XML 파일에 `<context:annotation-config/>` 설정 추가
- Java파일에 DI 대상에 `@Autowired` 또는 `@Resource` 설정
### @Autowired annotaion을 이용한 자동 주입
- `<context:annotation-config/>`
- 기존의 xml 파일의 경로를 추가해야 `context:annotation-config` 속성을 사용할 수 있다.
- annotaion 사용을 위해 `context:annotation-config` 속성이 반드시 xml 파일에 추가되있어야 한다.
<pre><code class="java" style="font-size:14px"><?xml version="1.0" encoding="UTF-8"?>
<beans xmlns="http://www.springframework.org/schema/beans"
xmlns:context="http://www.springframework.org/schema/context"
xmlns:xsi="http://www.w3.org/2001/XMLSchema-instance"
xsi:schemaLocation="http://www.springframework.org/schema/beans
http://www.springframework.org/schema/beans/spring-beans.xsd
http://www.springframework.org/schema/context
http://www.springframework.org/schema/context/spring-context.xsd">
<context:annotation-config/>
<bean id="~~~" class="package.ClassName"/>
</beans>
</code></pre>
- `@Autowired` 키워드를 사용
- `멤버변수`, `setter() 메소드`, `생성자`에 키워드를 사용해 자동 주입 할 수 있다.
- `@Autowired` 키워드가 명시된 곳을 찾아 자동으로 기입한다.
- `bean` 객체의 `class` 속성에 정의 된 타입 객체를 찾아 주입 시킨다.
### @Autowired가 객체를 찾는 순서
1. 타입 매칭(상속 관계도 찾아낸다)
2. @Qualifier 명시된 Bean 객체 찾는다.
3. ID가 같은 Bean 객체를 찾는다.
### @Resource가 객체 찾는 순서
1. 타입 매칭
2. id 매칭 중 id가 우선
### Autowired, Resource 차이
- @Autowired : `@Qualifier`를 사용하여 객체주입
- @Resource : `name` 속성을 사용하여 객체주입
### 직접 Bean 객체를 주입
```
@Autowired
@Qualifier("BeanID")
```
```
@Resource(name="BeanID")
```
```
@Autowired(required=false)
Bean 객체가 없으면 객체주입을 하지 말고 null을 주입 할 것
```
<br/>
### List 속성 주입코드
- List<String>의 적절한 객체를 만들고 생성자 주입과 속성 주입으로 객체를 주입할 수 있다.
<pre><code class="java" style="font-size:14px">
<bean id="list" class="DI07.ListAddress">
<!-- <constructor-arg> -->
<property name="address">
<list>
<value>서울시 서초구 서초동</value>
<value>서울시 송파구 송파동</value>
<value>서울시 강남구 압구정동</value>
<value>경기도 성남시 분당구</value>
</list>
</property>
<!-- </constructor-arg> -->
</bean>
</code></pre>
<br/>
### Map Entry 주입
- Map의 적절한 객체를 만들고 생성자 주입과 속성 주입으로 객체를 주입할 수 있다.
- key, value를 적절하게 설정 가능함
<pre><code class="java" style="font-size:14px">
<?xml version="1.0" encoding="UTF-8"?>
<beans xmlns="http://www.springframework.org/schema/beans"
xmlns:context="http://www.springframework.org/schema/context"
xmlns:xsi="http://www.w3.org/2001/XMLSchema-instance"
xsi:schemaLocation="http://www.springframework.org/schema/beans
http://www.springframework.org/schema/beans/spring-beans.xsd
http://www.springframework.org/schema/context
http://www.springframework.org/schema/context/spring-context.xsd">
<bean id="map" class="DI08.MapAddress">
<constructor-arg>
<map>
<entry>
<key><value>홍길동</value></key>
<value>서울시 서초구 서초동</value>
</entry>
<entry>
<key><value>박길동</value></key>
<value>서울시 강남구 압구정동</value>
</entry>
<entry>
<key><value>고길동</value></key>
<value>서울시 동작구 사당동</value>
</entry>
</map>
</constructor-arg>
</bean>
</beans>
</code></pre>
## Spring component-scan
____
- `xml` 파일 설정을 통해서 자동으로 빈으로 사용 될 객체를 등록한다.
- 지정된 패키지 하위의 모든 패키지를 스캔하여 빈으로 등록
- `Bean`으로 등록되려면 `Java` 클래스에서 `annotaion`을 사용해야 한다.
- `@Component`, `@Controller`, `@Service`, `@Repository`
- 설정값이 없는 경우 클래스이름의 첫자를 소문자로 적용한 `Bean`으로 등록
## Spring AOP(Aspect Oriented Programming)
____
- 공통의 관점과 핵심 기능의 관점을 분리시켜 개발하겠다는 것
- 관점 지향 소프트웨어 개발로 모듈화(응집도)를 증가시키는 것
- 핵심 기능과 부가 기능을 구현한 코드를 분리 한 것
- 필요할때 핵심 코드에 공통 코드를 주입 시키는 것(코드 주입)
1. Interface 기반
2. Proxy 패턴 기반
3. Runtime 시에 수행
### AOP dependency 추가하기
[http://mavenrepository.com](http://mavenrepository.com)
- `ascpect` 태그를 사용하기 위해서는 관련 `dependency`를 설정해줘야한다.
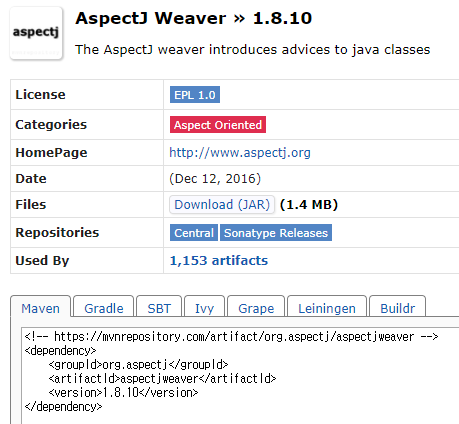
- 검색에 `AspectJ Weaver`, `AspectJ Runtime` 1.8.10 버전 클릭 후 dependency 코드 복사
- eclipse pom.xml의 `<dependencies>` 태그에 추가
<pre><code class="java" style="font-size:14px"><dependency>
<groupId>org.aspectj</groupId>
<artifactId>aspectjrt</artifactId>
<version>1.8.10</version>
</dependency>
<!-- https://mvnrepository.com/artifact/org.aspectj/aspectjweaver -->
<dependency>
<groupId>org.aspectj</groupId>
<artifactId>aspectjweaver</artifactId>
<version>1.8.10</version>
</dependency>
</code></pre>
- xml 파일의 `<beans>` 태그에 `<aop:aspectj-autoproxy />` 태그를 사용해 AOP를 구현할 수 있다.
### AOP xml 설정
- AOP 관련 namespace 추가
<pre><code class="java" style="font-size:14px"><?xml version="1.0" encoding="UTF-8"?>
<beans xmlns="http://www.springframework.org/schema/beans"
xmlns:context="http://www.springframework.org/schema/context"
xmlns:xsi="http://www.w3.org/2001/XMLSchema-instance"
xmlns:aop="http://www.springframework.org/schema/aop"
xsi:schemaLocation="http://www.springframework.org/schema/beans
http://www.springframework.org/schema/beans/spring-beans.xsd
http://www.springframework.org/schema/context
http://www.springframework.org/schema/context/spring-context.xsd
http://www.springframework.org/schema/aop
http://www.springframework.org/schema/aop/spring-aop.xsd">
<aop:aspectj-autoproxy />
<bean id="myAspect" class="AOP01.MyAspect" />
<bean id="boy" class="AOP01.Boy" />
<bean id="girl" class="AOP01.Girl" />
</beans>
</code></pre>
'웹 프로그래밍' 카테고리의 다른 글
| Spring - RequestMapping, Form 데이터 처리, ResponseBody 사용법 (0) | 2017.07.10 |
|---|---|
| Spring - AOP annotaion 용어, 패턴매칭, 자동주입 (0) | 2017.07.07 |
| Spring - 핵심 개념(IoC, DI) (0) | 2017.07.05 |
| Spring - Maven 설치 및 Eclipse 환경설정 하기 (0) | 2017.07.04 |
| Ajax 사용한 Daum 검색 API 사용하기 (0) | 2017.06.21 |